DISCLAIMER: THIS INFORMATION IS EXTREMELY OUT OF DATE.
Ceilometer is a fairly new component of OpenStack, so I thought it would be helpful to document how I install Ceilometer and DevStack. Ceilometer monitors and gathers data on other components in OpenStack. For example, one could use Ceilometer to measure CPU usage in order to bill customers.
In this post, I'll go through how I install Devstack and Ceilometer on a Vagrant virtual machine running 64-bit Ubuntu 12.04 LTS. Your host machine should have enough memory, so that it can run a virtual machine with 2 GB RAM.
Before getting into details, some disclaimers and explanations.
I assume that if you want to install Devstack, it's because you're interested in being a contributor to OpenStack development or because you just want to play with the code. Devstack is a shell script that builds an OpenStack development environment for people developing OpenStack; it's not meant for production.
I install Devstack and Ceilometer on a virtual machine. Why use a virtual machine? It's the recommended way to install Devstack. Cloud infrastructure software is complex. Devstack installs lots and lots of dependencies, and you probably don't want all those dependencies to be installed on your everyday environment. Moreover, if Devstack or Ceilometer breaks (which happens pretty regularly when you develop), it's a lot easier to start over from scratch if you're working in a virtual machine. You can simply destroy the old virtual machine and build a new one, without any effect on your everyday environment.
I'm using Vagrant because it was recommended to me, but there are plenty of other ways to run virtual machines. You are welcome to use your own method, but this post will only explain how to setup virtual machines using Vagrant.
Finally, note the date of this post. Devstack and Ceilometer are rapidly being developed, and this information could become deprecated very quickly.
- Install VirtualBox and Vagrant
- Configure Vagrant
- Install Devstack and Ceilometer
- Check that Devstack is working
- Configure Devstack for Ceilometer
- Check that Ceilometer is collecting data
- Run Ceilometer tests
- References
1. Install VirtualBox and Vagrant
Vagrant is software for building and distributing virtual development environments. It works with many virtualization software packages. By default, Vagrant uses VirtualBox for its virtualization software package.
Install VirtualBox
First, install VirtualBox. Follow the instructions on the VirtualBox Linux downloads page.
I'm running 64-bit Ubuntu 12.04 and here's what I did. First, I added the
following line to my etc/apt/sources.list file:
deb http://download.virtualbox.org/virtualbox/debian precise contrib
Then I downloaded and added the Oracle public key using
$ wget -q http://download.virtualbox.org/virtualbox/debian/oracle_vbox.asc -O- | sudo apt-key add -
I checked that I had the correct key by examining its fingerprint:
$ apt-key finger | grep VirtualBox -3
Finally, I installed VirtualBox by running the commands:
$ sudo apt-get update
$ sudo apt-get install virtualbox-4.2
Install Vagrant
Download the latest version at the Vagrant downloads page, as of this writing, v1.2.7. (The version at the Ubuntu repository is a bit behind the latest.) Then install it using your package manager. On 64-bit Ubuntu 12.04, I ran these commands to install Vagrant:
$ wget http://files.vagrantup.com/packages/7ec0ee1d00a916f80b109a298bab08e391945243/vagrant_1.2.7_x86_64.deb
$ sudo dpkg -i vagrant_1.2.7_x86_64.deb
2. Configure Vagrant
Next, create a directory where you will manage your Vagrant virtual machine (VM), for example,
$ mkdir ~/vagrant_devstack
Install Vagrant box
Now you need to pick a "box." Vagrant uses "boxes" as the base image for creating a virtual environment. A box is based on a specific operating system possibly with additional software and configurations. Vagrant has official bare-bones Ubuntu boxes, and there are also many other unofficial boxes at the community page located at www.vagrantbox.es.
I recommend sticking to the official boxes. Devstack officially supports Ubuntu 12.04, so install the 64-bit Ubuntu 12.04 box for VirtualBox:
$ vagrant box add precise64 http://files.vagrantup.com/precise64.box
(Yes, it's confusing that both my host machine and my Vagrant VM are running 64-bit Ubuntu 12.04 ! Your configuration may differ.)
A 64-bit OS is preferred, so that you can assign more RAM to your VM. Note that since we are running a 64-bit guest machine on VirtualBox, you need to make sure that hardware virtualization is enabled on your host machine. This may require you to access your machine's BIOS settings.
Create and configure Vagrantfile
Create a Vagrantfile using the commands
$ cd ~/vagrant_devstack
$ vagrant init precise64
and you should see the output
A `Vagrantfile` has been placed in this directory. You are now
ready to `vagrant up` your first virtual environment! Please read
the comments in the Vagrantfile as well as documentation on
`vagrantup.com` for more information on using Vagrant.
This creates a Vagrantfile in the directory where your Vagrant VM will be managed. The Vagrantfile is the configuration file for your Vagrant VM.
We are going to setup port forwarding and increase the RAM by altering the Vagrantfile. Open the Vagrantfile in your favorite text editor and see if there are any lines matching
# Create a forwarded port mapping which allows access to a specific port
# within the machine from a port on the host machine. In the example below,
# accessing "localhost:8080" will access port 80 on the guest machine.
# config.vm.network :forwarded_port, guest: 80, host: 8080
If you find the matching lines, uncomment the last line so that you have
config.vm.network :forwarded_port, guest: 80, host: 8080
If you don't have the matching lines, then manually copy and paste the above line to the Vagrantfile.
We are using port 8080, but you can use another port, as long as it isn't being used by another process. We will need port forwarding later to check that Devstack is working properly.
The recommended amount of RAM for Devstack is at least 2 GB. However, the default RAM in a Vagrant VM is 360 MB, so we need to change this.
Add the following lines to the Vagrantfile:
config.vm.provider :virtualbox do |vb|
  vb.customize ["modifyvm", :id, "--memory", "2048"]
end
My laptop I work on has 8 GB RAM, and it works fine running a 2 GB Vagrant/VirtualBox VM.
Here is a sample Vagrantfile that configures both port forwarding and 2 GB RAM.
3. Install Devstack and Ceilometer
Boot up the Vagrant VM
We are ready to install Devstack and Ceilometer. First, create the virtual environment and boot the virtual machine by running the commands
$ cd ~/vagrant_devstack
$ vagrant up
and you should see the output
Bringing machine 'default' up with 'virtualbox' provider...
[default] Setting the name of the VM...
[default] Clearing any previously set forwarded ports...
[default] Creating shared folders metadata...
[default] Clearing any previously set network interfaces...
[default] Preparing network interfaces based on configuration...
[default] Forwarding ports...
[default] -- 22 => 2222 (adapter 1)
[default] -- 80 => 8080 (adapter 1)
[default] Running 'pre-boot' VM customizations...
[default] Booting VM...
[default] Waiting for VM to boot. This can take a few minutes.
[default] VM booted and ready for use!
[default] Mounting shared folders...
[default] -- /vagrant
Now you can SSH into the machine via
$ vagrant ssh
and you should see the output
Welcome to Ubuntu 12.04 LTS (GNU/Linux 3.2.0-23-generic x86_64)

 * Documentation:  https://help.ubuntu.com/
Welcome to your Vagrant-built virtual machine.
Last login: Fri Sep 14 06:23:18 2012 from 10.0.2.2
vagrant@precise64:~$
Check that your virtual machine has 2 GB RAM:
vagrant@precise64:~$ grep MemTotal /proc/meminfo
MemTotal:        2051540 kB
If you see a different number, check your Vagrantfile.
Install Devstack and Ceilometer
Now that you are logged into your Vagrant VM, the first thing to do is download and update the package lists from the Ubuntu repositories:
vagrant@precise64:~$ sudo apt-get update
Next, install git and your favorite terminal text editor, for example,
vagrant@precise64:~$ sudo apt-get install git vim-gtk
Clone the Devstack GitHub repository:
vagrant@precise64:~$ cd ~
vagrant@precise64:~$ git clone git://github.com/openstack-dev/devstack.git
then copy the sample localrc to the top-level of the devstack repository:
vagrant@precise64:~$ cd ~/devstack
vagrant@precise64:~$ cp samples/localrc .
This file localrc allows you to configure user-defined variables in the
stack.sh script which installs Devstack.
(If you previously installed Devstack using the stack.sh script, you can
start the installation process for Ceilometer here. The only difference is
that you won't see the prompt for an admin password.)
Ceilometer is not enabled by default, so add the following to the end of your
localrc file:
# Enable the ceilometer services
enable_service ceilometer-acompute,ceilometer-acentral,ceilometer-collector,ceilometer-api
Now you are ready to install Devstack and Ceilometer! This is a CPU intensive process, so don't run any heavy programs in the background.
Run the script to do the installation:
vagrant@precise64:~$ ./stack.sh
and you should see the output
Using mysql database backend

################################################################################
ENTER A SERVICE_TOKEN TO USE FOR THE SERVICE ADMIN TOKEN.
################################################################################
This value will be written to your localrc file so you don't have to enter it
again.  Use only alphanumeric characters.
If you leave this blank, a random default value will be used.
Enter a password now:
Input a password as directed and sit back as everything is installed for you. It took about 30 minutes to install on my own VM.
The Ceilometer GitHub repository will be cloned to your
/opt/stack/ceilometer directory.
I already installed Devstack, but not Ceilometer
If for whatever reason you already installed Devstack but have not yet installed Ceilometer, no problem. You don't have to create a new VM. Skip down to the part in the instructions where it says you should begin if you previously installed Devstack.
Troubleshooting
-
If you have any problem whatsoever while running
./stack.sh, it is a good idea to check the logs in the directory/opt/stack/logs. The screen output from running./stack.shis saved there and the logs have names likestack.sh.log.<date>. The most recent log is saved in the filestack.sh.log.If you don't see any logs there, then check your Devstack configuration in the
localrcfile. There should be a line that sets theLOGFILEvariable, for example,LOGFILE=$DEST/logs/stack.sh.log
For more info, see the "stack.sh logging" section in the Devstack stack.sh documentation.
-
If you see an error immediately after running
./stack.shlikeImportError: No module named netaddr
then install the dependency
python-netaddr:vagrant@precise64:~$ sudo apt-get install python-netaddrThis is a bug I've encountered, but it should be fixed now.
-
If you see many errors of this type while running
./stack.sh:ERROR:root:Could not find any typelib for GnomeKeyring
then install the dependency
gir1.2-gnomekeyring-1.0:vagrant@precise64:~$ sudo apt-get install gir1.2-gnomekeyring-1.0This is a known bug.
-
If
stack.shcomplains that there is no mongo client, then install MongoDB packages that are version 2.2 or higher (this is the current requirement for Ceilometer). If there are Ubuntu MongoDB packages with version 2.2 or higher for your operating system, you can install them withvagrant@precise64:~$ sudo apt-get install mongodb-clients mongodb-serverIf you are using Ubuntu 12.04 (like we are in this guide), as of this writing,the MongoDB packages for Ubuntu 12.04 are too old (< 2.2). In that case, install the 10gen version
mongodb-10genby following the instructions here.
4. Check that Devstack is working
On your host machine (not the VM), open up your browser and point it to the
forwarded port. If it was 8080, you would use http://localhost:8080/. You
should see the OpenStack dashboard page with a login form:
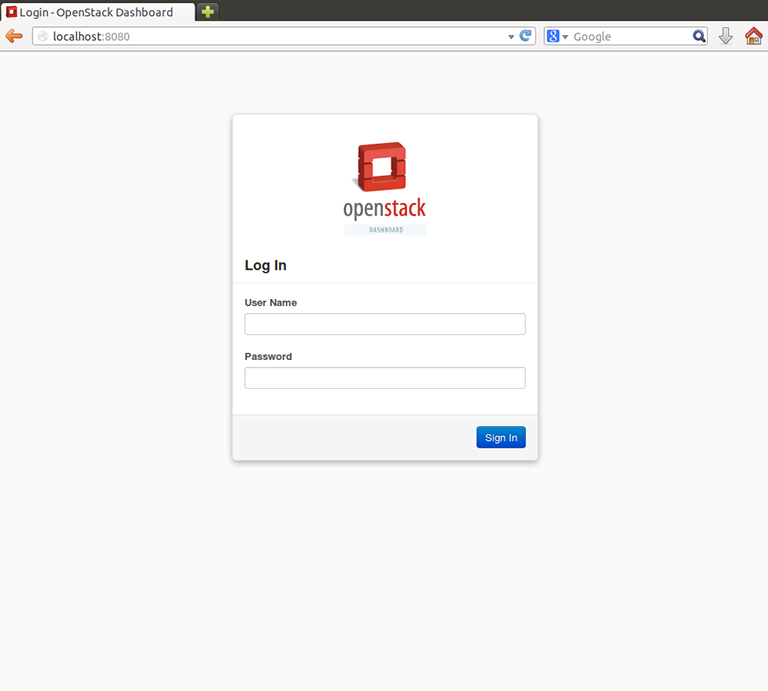
To login, provide the username admin and the corresponding password which can
be found in the ADMIN_PASSWORD variable of your localrc file.
Go to the project page at http://localhost:8080/project/ and you should be
able to see quotas like Instances Used 0 of 10, VCPUs Used 0 of 20,
RAM Used 0 MB of 51,200 MB, etc.

If you go to the system info page at http://localhost:8080/admin/info/, you should be able to see all the
enabled services:
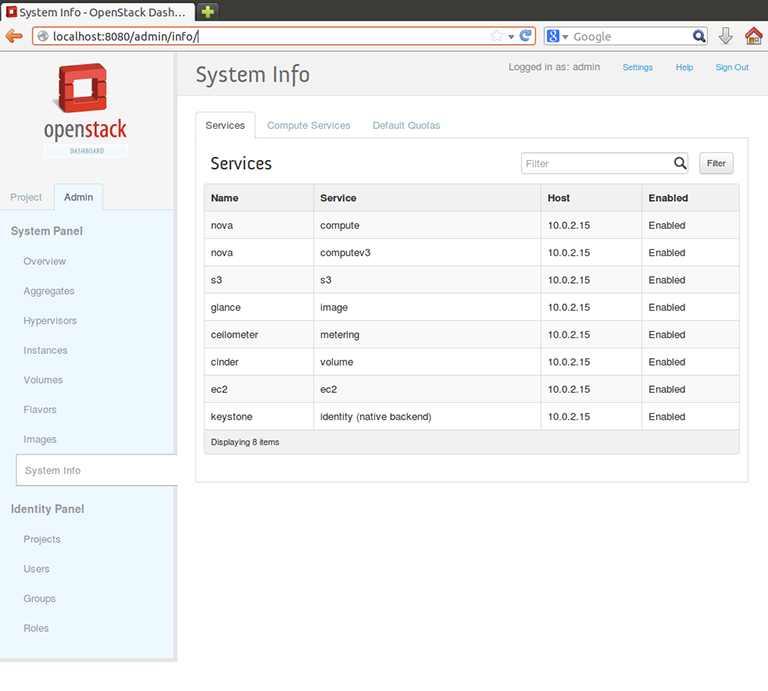
including nova, glance, ceilometer, etc.
5. Configure Devstack for Ceilometer
We want to enable auditing events for Nova and Cinder, so that Ceilometer can
collect data from them. As stated in the
Ceilometer documentation, do the following. First, check to
see if the Nova configuration file /etc/nova/nova.conf contains a line:
instance_usage_audit = True
If the line does not exist, add it to the file.
Second, add this line to the end of the Cinder configuration file
/etc/cinder/cinder.conf:
notification_driver=cinder.openstack.common.notifier.rpc_notifier
if it doesn't already exist.
6. Check that Ceilometer is collecting data
We can check that Ceilometer is collecting data by starting up the MongoDB shell, connecting to the Ceilometer database, and examining the data.
First, start up the MongoDB shell and connect to the Ceilometer database by running
vagrant@precise64:~$ mongo ceilometer
which should produce the output
MongoDB shell version: 2.0.4
connecting to: ceilometer
>
and leave you at the prompt.
Ask for the number of samples that have been collected:
> db.meter.stats().count
You should get a number greater than 0; I got 19 samples. As time goes on, the number will increase.
The command db.meter.findOne() should return the information for one sample,
for example,
> db.meter.findOne()
{
    "_id" : ObjectId("51f85d6a56c02c63d2d503b3"),
    "counter_name" : "image.upload",
    "user_id" : null,
    "message_signature" : "3986da6d1ac0ef522f11c52dbf76119d9f93c79204fa3ca373017c78acb751a7",
    "timestamp" : ISODate("2013-07-31T00:42:17.639Z"),
    "resource_id" : "6fd80822-b6e5-4a8c-8e37-caec037ff19b",
    "resource_metadata" : {
        "status" : "saving",
        "created_at" : "2013-07-31T00:42:17",
        "event_type" : "image.upload",
        "deleted" : false,
        "container_format" : "aki",
        "min_ram" : 0,
        "disk_format" : "aki",
        "updated_at" : "2013-07-31T00:42:17",
        "name" : "cirros-0.3.1-x86_64-uec-kernel",
        "min_disk" : 0,
        "host" : "precise64",
        "protected" : false,
        "id" : "6fd80822-b6e5-4a8c-8e37-caec037ff19b",
        "checksum" : "c352f4e7121c6eae958bc1570324f17e",
        "owner" : "728bca2e0c5147e6952427de5a21f90e",
        "is_public" : true,
        "deleted_at" : null,
        "properties" : {

        },
        "size" : 4955792
    },
    "source" : "openstack",
    "counter_unit" : "image",
    "counter_volume" : 1,
    "project_id" : "728bca2e0c5147e6952427de5a21f90e",
    "message_id" : "0d41abf8-f97a-11e2-b536-080027880ca6",
    "counter_type" : "delta"
 }
Running the command show collections lists all the other MongoDB collections
you can look at, for example,
> show collections
meter
project
resource
system.indexes
user
The Ceilometer documentation glossary defines some of these terms "meter", "project", "resource", "user".
You could list all the defined indexes using
> db.system.indexes.find()
which on my VM gave the output
{ "v" : 1, "key" : { "_id" : 1 }, "ns" : "ceilometer.resource", "name" : "_id_" }
{ "v" : 1, "key" : { "user_id" : 1, "source" : 1 }, "ns" : "ceilometer.resource", "name" : "resource_idx" }
{ "v" : 1, "key" : { "_id" : 1 }, "ns" : "ceilometer.meter", "name" : "_id_" }
{ "v" : 1, "key" : { "resource_id" : 1, "user_id" : 1, "counter_name" : 1, "timestamp" : 1, "source" : 1 }, "ns" : "ceilometer.meter", "name" : "meter_idx" }
{ "v" : 1, "key" : { "timestamp" : -1 }, "ns" : "ceilometer.meter", "name" : "timestamp_idx" }
{ "v" : 1, "key" : { "_id" : 1 }, "ns" : "ceilometer.user", "name" : "_id_" }
{ "v" : 1, "key" : { "_id" : 1 }, "ns" : "ceilometer.project", "name" : "_id_" }
These indexes speed up searching and sorting on MongoDB data.
Type exit to leave the MongoDB shell and return to bash.
For more information about MongoDB shell commands, see the official MongoDB documentation.
7. Run Ceilometer tests
The Ceilometer documentation explains how to setup and run unit
tests. First, install the package tox:
vagrant@precise64:~$ sudo pip install tox
Then install the test dependencies:
vagrant@precise64:~$ sudo pip install -r /opt/stack/ceilometer/test-requirements.txt
This will take at least a few minutes to run. If the dependencies were installed correctly, you should get a message that looks similar to
Successfully installed discover mock swift netifaces sphinxcontrib-pecanwsme docutils oslo.sphinx testscenarios nova dnspython sphinxcontrib-httpdomain
Cleaning up...
Run the entire test suite in Python 2.7 and check for PEP8 style errors:
vagrant@precise64:~$ cd /opt/stack/ceilometer/
vagrant@precise64:/opt/stack/ceilometer$ tox -e py27,pep8
This will take a while. On my VM, the tests took 10 - 15 minutes to run.
If everything runs correctly, you will get a message similar to
  py27: commands succeeded
  pep8: commands succeeded
  congratulations :)
The OpenStack dashboard is working, Ceilometer is collecting samples, and the unit tests pass. Congratulations! You have a working Devstack and Ceilometer!
More ways to run tests
The Ceilometer unit tests are run using testr (manual here).
You can also run just the Python 2.7 tests
vagrant@precise64:~$ tox -e py27
or just the PEP8 tests
vagrant@precise64:~$ tox -e pep8
If you don't need to run the whole test suite, you can run a group of tests.
To run the Python 2.7 tests in the tests/storage directory of the Ceilometer
code, you would execute
vagrant@precise64:~$ tox -e py27 -- storage
If you want to run just a single test from tests/storage, you need to use the
entire file path:
vagrant@precise64~$ tox -e py27 -- tests.storage.test_impl_mongodb.MeterTest.test_get_meters_by_metaquery
Here we're running the test_get_meters_by_metaquery test for the MongoDB
storage driver.
Anything after -- is treated as an argument for testr. Each argument is
treated as a regular expression. That leads to an interesting scenario.
When you are running tests in testr by path, be careful if your specified
path is a substring of other paths. For example, if you run the test
test_get_meters using the command
vagrant@precise64~$ tox -e py27 -- tests.storage.test_impl_mongodb.MeterTest.test_get_meters
the following tests will be executed -- test_get_meters,
test_get_meters_by_user, test_get_meters_by_project,
test_get_meters_by_metaquery, test_get_meters_by_empty metaquery -- because
they all start with test_get_meters and are counted as matches by the regex
filter.
Troubleshooting
-
If you see an error message
StorageBadVersion: Need at least MongoDB 2.2
then your MongoDB version is too old and you need to install MongoDB packages that are version 2.2 or higher (this is the current requirement for Ceilometer).
If there are Ubuntu MongoDB packages with version 2.2 or higher for your operating system, you can install them with
vagrant@precise64:~$ sudo apt-get install mongodb-clients mongodb-serverIf you are using Ubuntu 12.04 (like we are in this guide), as of this writing,the MongoDB packages for Ubuntu 12.04 are too old (< 2.2). In that case, install the 10gen version
mongodb-10genby following the instructions here. -
If you see the following error while installing the requirements:
No package 'libffi' found
then install the missing dependency with
vagrant@precise64:~$ sudo apt-get install libffi-devThis is a known bug.
-
If you get the following error while installing the requirements:
RuntimeError: No package configuration found for: nspr
then install the missing dependencies with
vagrant@precise64:~$ sudo apt-get install pkg-config libnspr4-dev -
If you get this error while installing the requirements that says
ERROR: /bin/sh: 1: xslt-config: not found

** make sure the development packages of libxml2 and libxslt are installed **
then install the missing dependencies with
vagrant@precise64:~$ sudo apt-get install libxml2-dev libxslt1-dev -
If all else fails, try rebuilding the test environment with the
-rflag:vagrant@precise64:~$ tox -r -e py27This can take anywhere between 15 minutes to an hour depending on the configuration.
8. References
I've mentioned some references to documentation along the way, here's a summarized list of them, plus a couple more.
-
This is v2 of the documentation for Vagrant. However, I sometimes find it helpful to look at the deprecated documentation for v1. The v1 documentation sometimes contains details that are not present in the v2 documentation and yet are still applicable to the latest version of Vagrant. The Vagrant commands I use most often are
vagrant up(boot up the VM),vagrant ssh(ssh into the VM),vagrant init(create a Vagrantfile in preparation for making a new VM), andvagrant destroy(permanently destroy the data I've accumulated while working in the VM). -
Also, check out the code annotations for the Devstack
stack.shscript
Comments
comments powered by Disqus