DISCLAIMER: This information may be out-of-date. This post was written using Pelican version 3.2 and the themes and plugins in July 2013. However, last I checked (August 2015), almost everything still works.
I thought it would be useful to go into greater technical detail about how I went about setting up Pelican.1
My machine is running Ubuntu 12.04 LTS.
Summary:
- Install Pelican and its dependencies in a virtual environment.
- Run
pelican-quick-start - Fork the Pelican themes and Pelican plugins on GitHub and clone the forks onto my local machine.
- Modify Pelican themes to my taste. I modified the bootstrap theme.
- Make additional directories inside
contentdirectory. - Modify settings in
pelicanconf.pyandpublishconf.py - Setup Google Analytics/Piwik and Disqus.
Demonstration
If you'd like to see some of Pelican's features in action (Markdown, formatting, \(\LaTeX\), etc.), see my earlier post on demonstrating Pelican.
Installing Pelican and dependencies
To install Pelican and other Python package dependencies in a virtual environment, I followed the instructions in the official Pelican documentation.
$ virtualenv ~/virtualenvs/pelican
$ cd ~/virtualenvs/pelican
$ . bin/activate
$ pip install pelican
$ pip install Markdown
Don't use sudo pip when installing these Python packages in a virtual
environment, otherwise you'll end up installing them globally which defeats the
purpose of using virtual environments.
I wanted to use Markdown to write my blog posts, so I needed to install the Python Markdown package in the last line. By default, Pelican uses a flavor of Markdown that mostly follows PHP Markdown Extra. I especially like using the footnotes extension.
After you're done working with Pelican, you can leave the virtual environment with
$ deactivate
Running pelican-quickstart
Here are the configuration options I used for pelican-quickstart. The details
for SSH upload have been anonymized for security reasons.
$ pelican-quickstart
Welcome to pelican-quickstart v3.2.2.

This script will help you create a new Pelican-based website.

Please answer the following questions so this script can generate the files
needed by Pelican.

> Where do you want to create your new web site? [.] blog
> What will be the title of this web site? terriyu@/media/blog
> Who will be the author of this web site? Terri Yu
> What will be the default language of this web site? [en]
> Do you want to specify a URL prefix? e.g., http://example.com   (Y/n) Y
> What is your URL prefix? (see above example; no trailing slash) http://terriyu.info
> Do you want to enable article pagination? (Y/n) Y
> How many articles per page do you want? [10]
> Do you want to generate a Makefile to easily manage your website? (Y/n) Y
> Do you want an auto-reload & simpleHTTP script to assist with theme and site development? (Y/n) Y
> Do you want to upload your website using FTP? (y/N) N
> Do you want to upload your website using SSH? (y/N) Y
> What is the hostname of your SSH server? [localhost] ip.add.ress
> What is the port of your SSH server? [22]
> What is your username on that server? [root] username
> Where do you want to put your web site on that server? [/var/www] /somedirectory
> Do you want to upload your website using Dropbox? (y/N) N
> Do you want to upload your website using S3? (y/N) N
I enabled article pagination so that I didn't end up with all the posts on a
single page. The Makefile is incredibly useful, so I enabled that. It allows
you to compile the website with make html or make devserver. Usually, when
I want to test my website, I run make clean (to delete any previously
generated files), followed by make devserver to run a fake server on my local
machine. I find that make devserver is a better simulation of the website
than make html. I'm not sure what the auto-reload & simpleHTTP script is, but
I enabled it just in case.
When I'm ready to upload my content to the web host, there are a variety of
options. I don't enable FTP upload because it's not very secure. I try to
stick with some transfer method that uses SSH. You can use make ssh_upload
which works fine, but I prefer make rsync_upload which uploads using rsync
and SSH. Unlike make ssh_upload which uses scp and uploads everything, the
rsync command only sends incremental changes, which makes your data transfer
much more efficient.
All the make commands have to be run in the same directory as the Makefile.
Fork and clone the GitHub repos for pelican-themes and pelican-plugins
I wanted to modify the official Pelican themes and Pelican plugins, and have them under version control, so I performed the standard procedure of forking the GitHub repos and cloning the forks. My procedure was very similar to the GitHub help page except I cloned using the SSH address rather than the https address.
Modify Pelican theme to taste
I am using the bootstrap theme. I modified it in the following way:
- Modified
static/bootstrap.min.css- Increased font size and line height
- Changed sizes and alignment of top bar, sidebar, and content
- Eliminated line in page header
- Modified
bootstrap/static/local.css- Changed icons to use Font Awesome's set
- Changed alignment of icons
- Modified
static/pygments.cssto use the perldoc colors by generating a CSS stylesheet - Added code to
templates/article.htmlfor neighboring links. This means that if you are on a post, you will see a link for the previous post and a link for the next post. You need to enable the neighbors plugin for this to work. - Modified
templates/base.html- Added code for including \(\LaTeX\). For this to work, you need to enable the latex plugin.
- Added code for including Piwik content
- Altered sidebar links
- Modified
templates/index.htmlto change look of the more... link in the summaries, got rid of the permalink line, and added the date before each post title - Modified
templates/metadata.htmlto use the variablearticle.locale_dateinstead ofarticle.dateso that it uses myDEFAULT_DATE_FORMATvariable inpelicanconf.py - Added
templates/piwik.html(copied from bootstrap2 theme) for Piwik support - Modified
templates/tags.htmlto sort tags in alphabetical order
To sort tags in alphabetical order, use
{% for tag, articles in tags|sort %}
Make additional directories inside content directory
I made directories 2013, images, and pages in the content
directory. This is the way I organized my content. Posts in 2013 go into
2013, photos go into images, and special non-chronological content goes into
pages. I plan to make a new directory for each year and it would contain the
posts for that particular year. The only directory that has to have a specific
name is pages. Pelican treats this name as special. My
About page is contained inside the directory
pages.
For more information about the file hierarchy, see the Pelican documentation.
Modify settings in pelicanconf.py and publishconf.py
This is my pelicanconf.py file.
#!/usr/bin/env python
# -*- coding: utf-8 -*- #
from __future__ import unicode_literals

AUTHOR = u'Terri Yu'
SITENAME = u'terriyu@/media/blog'
SITEURL = ''

TIMEZONE = 'America/New_York'

DEFAULT_LANG = u'en'

# Feed generation is usually not desired when developing
FEED_ALL_ATOM = None
CATEGORY_FEED_ATOM = None
TRANSLATION_FEED_ATOM = None

# Feeds
FEEDS =  (('All posts', 'feeds/all.atom.xml'),
          ('Category', 'feeds/category'),
          ('OPW', 'feeds/tag/opw.atom.xml'),)

# Social widget
SOCIAL = (('Github', 'https://github.com/terriyu'),
          ('Twitter', 'https://twitter.com/terrimyu'),
          ('Linkedin', 'https://linkedin.com/in/terriyu'),)

DEFAULT_PAGINATION = 10

# Uncomment following line if you want document-relative URLs when developing
RELATIVE_URLS = True

# Formatting for dates

DEFAULT_DATE_FORMAT = ('%a %d %B %Y')

# Formatting for urls

ARTICLE_URL = "posts/{date:%Y}/{date:%m}/{slug}/"
ARTICLE_SAVE_AS = "posts/{date:%Y}/{date:%m}/{slug}/index.html"

CATEGORY_URL = "category/{slug}"
CATEGORY_SAVE_AS = "category/{slug}/index.html"

TAG_URL = "tag/{slug}/"
TAG_SAVE_AS = "tag/{slug}/index.html"

# Generate yearly archive

YEAR_ARCHIVE_SAVE_AS = 'posts/{date:%Y}/index.html'

# Show most recent posts first

NEWEST_FIRST_ARCHIVES = False

# Specify theme

THEME = "/home/terri/pelican/pelican-themes/bootstrap"

# Plugins

PLUGIN_PATH = '/home/terri/pelican/pelican-plugins'
PLUGINS = ['latex', 'neighbors', 'summary']

# Only use LaTeX for selected articles

LATEX = 'article'
The configuration file is mostly self-explanatory. I uncommented the line for
relative URLs. I also specified custom URLs for article, category, tag, and
year archive, so that the URLs are more concise and don't have any .html
extension. For example, instead of posts/2013/06/pelican-setup.html, I would
have posts/2013/06/pelican-setup/. I added lines to show most recent posts
first and to use the bootstrap theme. I also enabled the latex,
neighbors, and summary plugins. The line LATEX = 'article' allows you to
turn on \(\LaTeX\) support by adding the line Latex: in the head of a post. I
like using the summary plugin2 because I can control exactly how much of each
post is shown on the index page by using markers. Also, if I set the
<!-- PELICAN_END_SUMMARY --> marker before footnotes, then I avoid the
bug where footnotes appear in the summary.
Below is my publishconf.py file with the Disqus and Google Analytics
specifics anonymized.
#!/usr/bin/env python
# -*- coding: utf-8 -*- #
from __future__ import unicode_literals

# This file is only used if you use `make publish` or
# explicitly specify it as your config file.

import os
import sys
sys.path.append(os.curdir)
from pelicanconf import *

SITEURL = 'http://terriyu.info/blog'
RELATIVE_URLS = False

FEED_ALL_ATOM = 'feeds/all.atom.xml'
CATEGORY_FEED_ATOM = 'feeds/category/%s.atom.xml'
TAG_FEED_ATOM = 'feeds/tag/%s.atom.xml'

DELETE_OUTPUT_DIRECTORY = True

# Following items are often useful when publishing

DISQUS_SITENAME = 'disqus-sitename'
GOOGLE_ANALYTICS = 'google-analytics-id'

PIWIK_URL = 'url.where.piwik.install.is.located'
#PIWIK_SSL_URL = ''
PIWIK_SITE_ID = '1'
I mostly kept the default file, but added a tag feed.
Setup Google Analytics/Piwik and Disqus
Just go to the relevant website
Google Analytics,
Piwik, or Disqus and follow the
directions on how to set it up. Then add the appropriate IDs to your
publishconf.py file (see my example file from the last section). Piwik needs
to be installed on a server. The major web hosts
Bluehost and Dreamhost
support one-click Piwik installs. Or, if you have a friend who is willing to
share their Piwik install with you, that also works. The variable
PIWIK_SSL_URL is for extra security and optional.
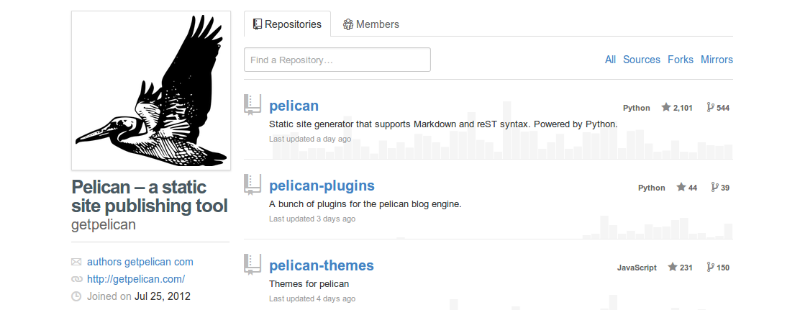
-
Top image taken from Pelican GitHub page ↩
-
Currently, there is an incompatibility between the
summaryplugin and the version 3.2 release of the Pelican package. Thesummaryplugin in the pelican-plugins GitHub repository has been updated to be consistent with the development version of Pelican. Therefore, if you try to use the latestsummaryplugin from the GitHub repo with Pelican v3.2, you'll get an error related to theDEFAULT_CONFIGvariable. To fix this, go into your cloned Git repo ofpelican-pluginsand manually change the code insummary/summary.py. Simply replaceDEFAULT_CONFIGwith_DEFAULT_CONFIGin the file. See this pull request for reference. ↩
Comments
comments powered by Disqus